

So, maybe you are excited to sew the Olivia dress or tunic, or the Elsa & Elliot coat, but have never tried sewing buttons and buttonholes before. It could be really difficult… But no! It’s surprisingly easy and kind of fast. When I myself tried it the first time I did some reading before and then on my first attempt I made a really nice buttonhole.
It should be added that for the Olivia, and the Elsa & Elliot, you could instead use snap buttons if you prefer them :)
But buttons and buttonholes are so much fun! Especially on children’s clothes I think. There are so many cute/pretty/stylish ones you could use to complement the fabric. A splash of color on a black/white dress for example, or a button that highlights a color on the fabric.. The options are endless.
You can sew the buttonholes by hand (but I’ll admit I have never tried it), and you can use your sewing machine. How you do it depends on your sewing machine, and for that reason this blog post is not about “how to sew buttonholes”, there are many different ways. I recommend that you turn to your sewing machine’s manual for such instructions.
Common to many of them is that you remove your regular presser foot and put in a buttonhole foot, which in many cases comes with the sewing machine as you purchase it. But they are quite inexpensive if you need to buy one.
FOUR STEP BUTTONHOLES
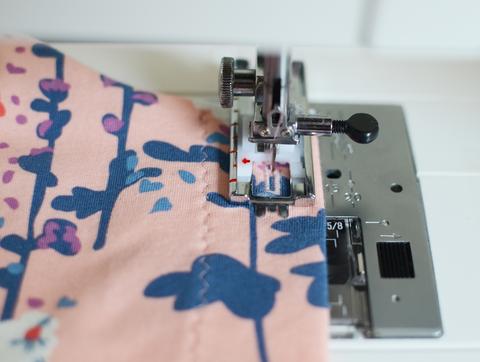
Some sewing machines sew buttonholes in one step and it’s all done automatically. Others sew them in four steps. I have two sewing machines, one sews them automatical, the other in four steps. And guess what? They both look great!
Sewing four step buttonholes: After having switched to a buttonhole foot I set the machine to sewing seam 1 in the buttonhole, and stitch length 0,5. After seam 1 I manually set it to seam 2. Then 3, and finally 4 (which is the same as 2). This takes about 1 minute.
MEASURING AND MARKING
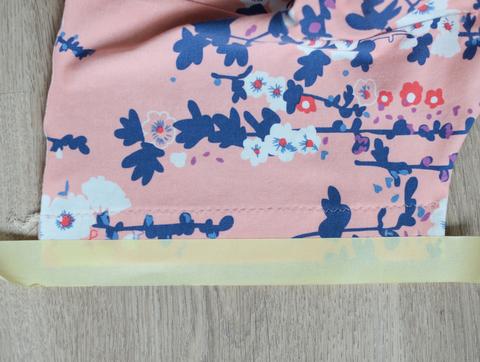
The thing that does require more from you is measuring and marking where the buttonholes should be sewn, making sure they are accurately spaced out and in a perfect line. One tip here is that you could use masking tape or washi tape to trace a perfect line.
INTERFACING STABILIZES
When you’re sewing with knit fabric you should remember to use non-stretch interfacing to stabilize the buttonhole. So, following the manufacturer’s instructions, iron it onto the inside of the button placket.
SEWING BUTTONS
I sew my buttons with a hand sewing needle like this: I start by anchoring the thread right where the center of the button should be. Then I take out the button and I bring the threaded needle through its holes about 5-10 times, until it feels secure. After that I bring the threaded needle three times around the stitches, in between the button and the fabric, and then through the fabric, back to the wrong side, where I anchor and finish.
Good luck!