

Today we're giving the floor to Janine Oosterhuis who's back to share an awesome pattern hack with us! How to sew a lined and reversible jacket with our sewing pattern, the Billy & Betty bomber jacket. Thanks Janine!
***
Step 1
First sew two jackets with fronts, back and sleeves (up to step 26 in the tutorial for Billy & Betty).
Leave a turning gap in one sleeve of the lining. I usually make this turning gap just below the armpit in the arm, about 5-6 cm wide (see dotted line), at least one centimeter from the "armpitcross".


Step 2
Fold and sew the neckband (the bomber collar) to one of the two jackets. Sew within the seam allowance.


Step 3
Sew the waistband to both of the jackets, right sides together. The waistband is still one long band here, you don't fold it.


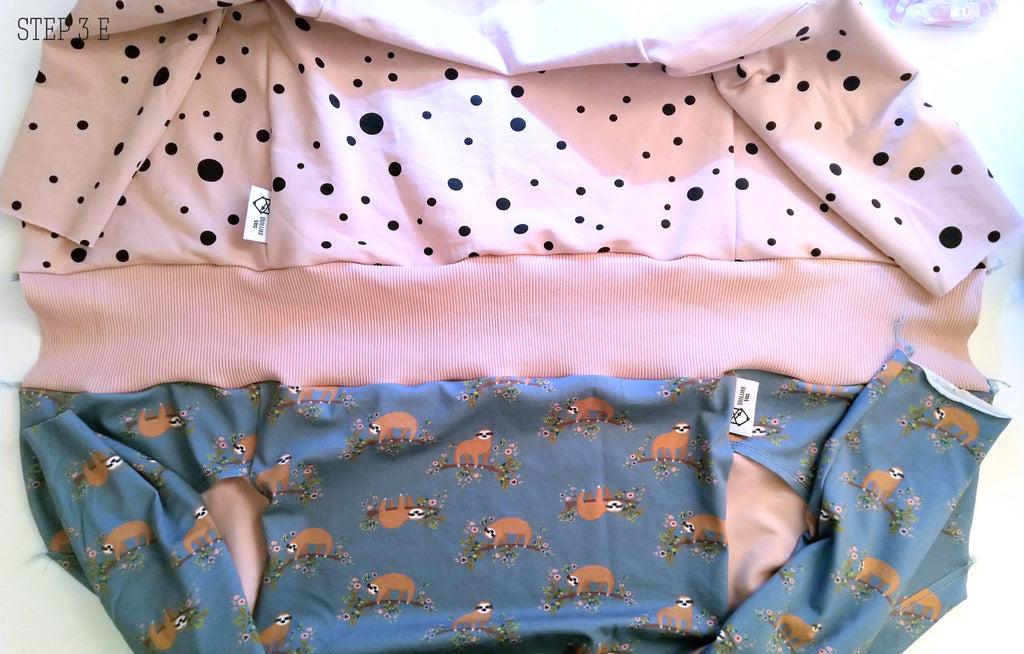
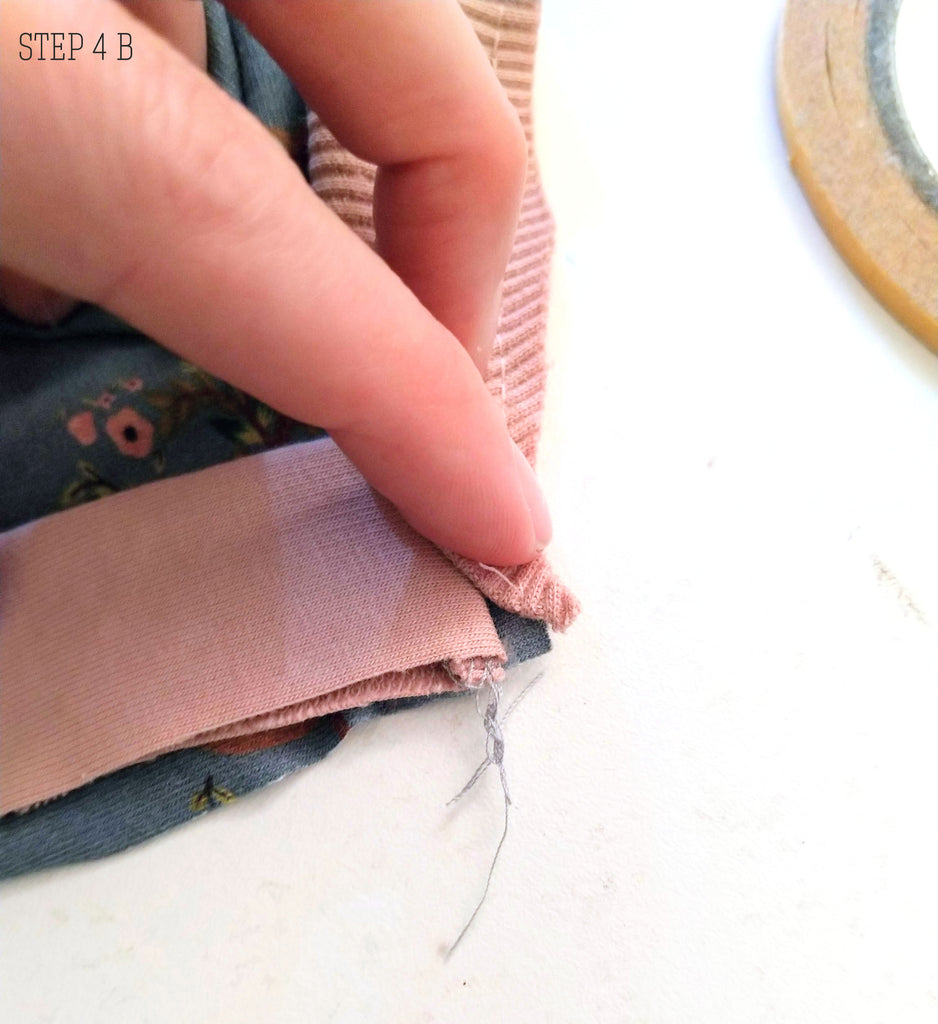
Step 4
Place the button placket between both jackets, both left and right. Mark the centre of the waistband at the bottom by placing both seams together (step 4A). Place your button placket in between it (with wonder tape). Make sure you have 1 cm seam allowance at the top (step 4B).
When using a zipper you do exactly the same, but you use a zipper instead of the button placket.


Step 5
Close the jacket completely. First the center fronts, then the neckline. Be careful not to sew over your button placket when sewing the neckline, but exactly above it.
Tip: To make the seams run smoothly, such as at the transition from your jacket to the waistband, you can use wonder tape / sewing tape.

Step 6
Sew the sleeve cuffs:
Put your jacket down in front of you, with all sleeves pointing outwards (step A).
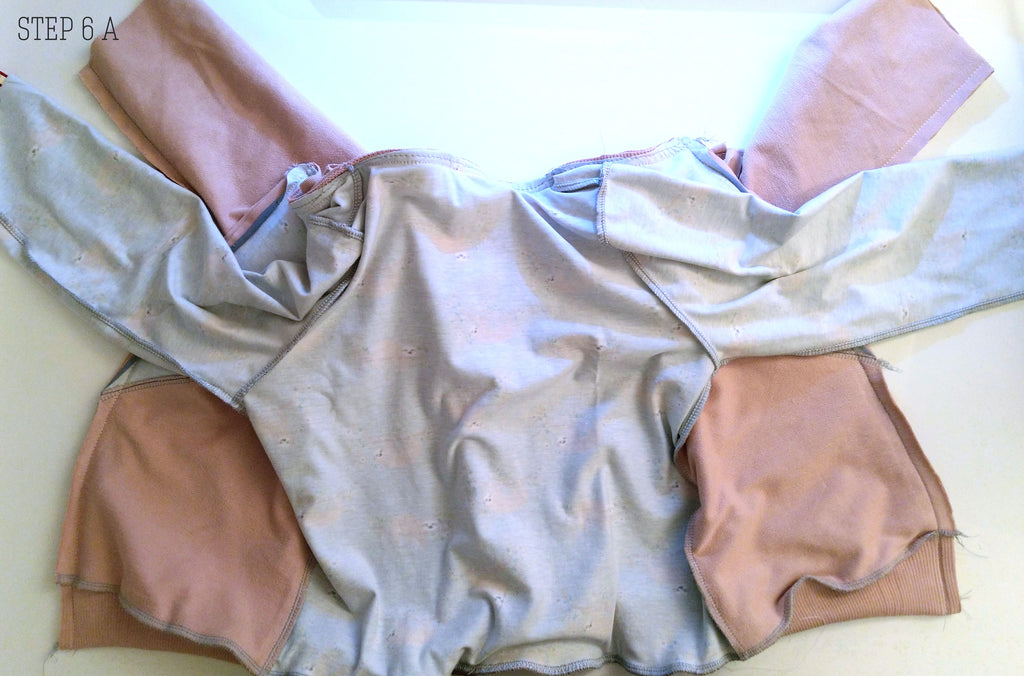
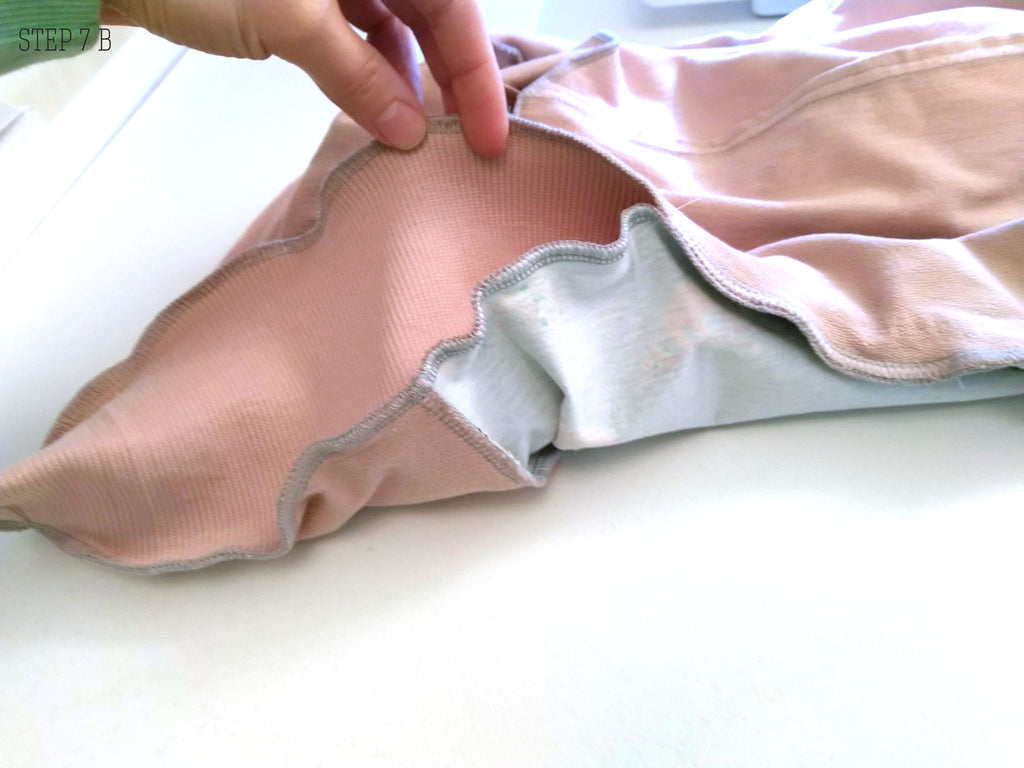
Close your sleeve cuffs and fold them like the pattern says (step B). Divide your sleeve cuffs and your sleeves in two with a wonderclip / pin; one on the seam, one directly opposite (step B/C). Take both sleeves from lining and outer fabric together (step C).


Fold the lining sleeve about 5 centimeters, so you can see the right side of the fabric (step D).

Slide the sleeve cuff over it, with the opening first, clip on clip (step E).

Make sure the seams are on top of each other. Slide the outer fabric sleeve over it (step F). Secure this well with clips / pins. Sew these layers together.


Step 7 (you can skip this if you want):
Sew the middle part of the waistband together. This ensures that the waistband stays in place better.


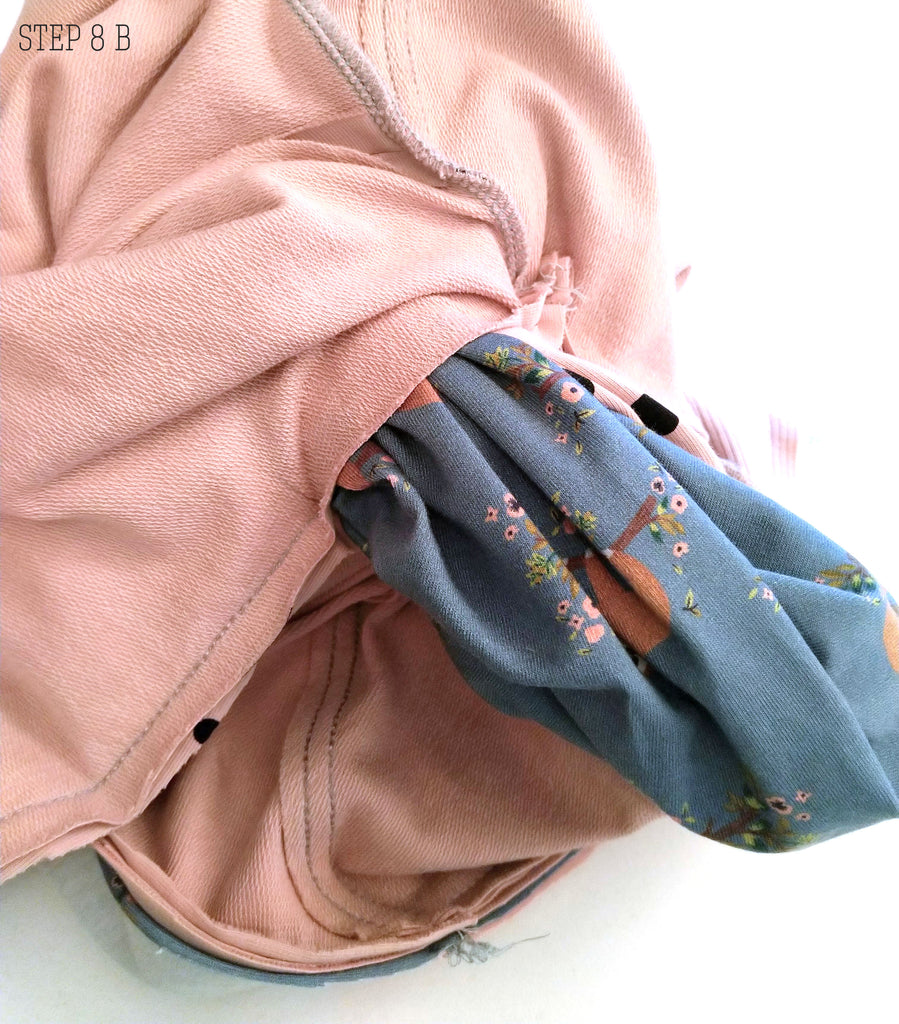
Step 8
Trim all corners and turn the jacket through the turning gap in the sleeve.

Step 9
Sew the turning gap. With a reversible jacket you use an "invisible stitch" (step B). (Find yourself great tutorials on You Tube!)
Put the buttons in or topstitch the zipper.


Done!
Hopefully this tutorial helped you to make your lined (reversible) jacket! ☺


***
That reversible bomber jacket looks really gorgeous! Thank you so much Janine for sharing your pattern hack!
Check out Janine's sewing on Instagram: @vrolijkevos and her website: www.vrolijkevos.nl.
And the sewing pattern for the bomber jacket is the Billy & Betty.