

Here's my Christmas dress à la 2021! I used my sewing pattern Emma and hacked it with a few really nice modifications. I love playing with patterns like this, and I'll tell you all about what I did here :)

PATTERN: Emma blouse & dress.
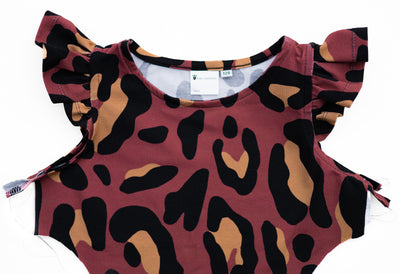
FABRIC: knit jacquard in the color "chalky green" from MeterMeter.dk / Mind the MAKER. Weight 280 gr/m2. So this fabric has more weight than I've primarily recommended for Emma. It does have some drape though, which is important for this dress design. And it has lots of stretch and great recovery since the fabric contains elastane.
I'm glad I chose this lovely green color, knowing that if I'd sewn a red dress for Christmas, I probably would have only worn it for Christmas, and that's just too bad. This green dress can be worn all year round.
MODIFICATIONS: I've done 3 things to hack the original pattern:
1) A V-neck back
2) Elastic casing along front and back - instead of tie waistband
3) Lengthened sides
Two of these hacks have already been described in previous blog posts so use the links above to check them out.

Before deciding on my final design I also considered:
- Sewing the elastic casing on the sleeves/sides instead of front/back
- Sewing the elastic casing all the way around the waist - after attaching the sleeves/sides to the front/back
- Sewing a round neck on the front, and V-neck on the back.
Here's how I sewed my hacked Emma Christmas dress:
First of all, the V-neck back: cutting

After I had traced my chosen size of the front and back, I placed my back piece on top of the front, making sure to match the center line and shoulders.
Then I traced the front's V-neckline on top of the back piece.

Since I wanted to keep the original back neckline on the pattern piece, I made small cuts along the V neck, then folded that part away - so that I could cut the V-neck back this time.

The lengthened sides: cutting
I lengthened the sides of both front and back by 12 cm. More info about that pattern hack here. I did keep the little slit on this dress because I think it's cute.

The elastic casing: cutting and sewing
I mostly followed the pattern hack written by Frida (@virvelvi) but I can show you the steps here as well. I cut two strips of fabric to create the casing. These strips need to have the same length as the front/back. The width depends on the width of your elastic. Add 2,5-3 cm to that. My elastic is 3,5 cm wide so my fabric strips are a little more than 6 cm wide.
Draw a straight line on the wrong side of your front and back. Start at the lower marking for the sleeve opening on one side - all the way to the lower marking on the other side.
On your fabric strips: Fold and press 1 cm to the wrong side along the long side.

Place the fabric strip 1 cm higher than your drawn line. The fabric strips's right side meets the back piece's wrong side. Sew with straight stitches, 1 cm from the edge (see red dots).

Then fold the fabric strip upwards and press. Use aqua glue marker or pins to keep it in place. Then sew again, using straight stitches, from one side to the other - approx. 2-3 mm from the folded edge.

Now the casing is sewn both to my front and back piece.
Placed to the left: what my casing looks like from the wrong side. I should give it a press to make it less wavy. To the right: what my casing looks like from the right side.

Insert the elastic into the casings.

Now, how short should the elastic be? In other words, how much do you want it to cinch the waist? I started by making it 13 cm shorter than the width of the front/back. That's about 70%.
Now it looks like this (I ended up removing even more later).

I was afraid that if I made the elastic too short the sleeves/sides would be too much pulled in to the front/back - and if I made it too long it wouldn't cinch the waist very much and I'd feel like I'm wearing a tent.
I held it up in front of me and decided that this would be fine.
(Later I ended up removing 9,5 cm more, so my elastic was only 22 cm long - and the width of my front/back in my size was 44 cm. In other words, the length of elastic I ended up using was 50% of the front's/back's width).

When you're happy with your elastic's length, attach it to the casing and front/back. Sew with zig zag stitches within the seam allowance (approx. 5-8 mm from the edge).

We're now almost done with the casing. Attach the sleeves and sew the side seams as Emma's tutorial shows.
It was after that, when I tried on my dress that I realized it did feel a bit like wearing a tent, for me anyway :) So I ripped the seam of the front/sleeves where the elastic was so that I could pull it out and remove 9,5 cm more. Both on the front and back.

Sewing a V-neck back
Measure the length of the original back neckline. Then measure your new V-neck. (See my tutorial here on measuring necklines). My new V-neck back is 10,8 cm longer than the original back. So I added 10,8 cm to the neckband and cut it on the fold.
Then I split it into two equally long neckbands. And like Emma's tutorial shows, I folded them wrong sides together and pressed.

First, sew one neckband to the neckline. Start sewing at the exact point of the V, with 1 cm seam allowance - and then all the way to the exact point of the other V. Please see Emma's tutorial, step 10-11) for more tips and instructions. This blog tutorial is only created to be used together with Emma's original tutorial - to explain what to do differently.

Place and pin your other neckband on the other side of the neckline. Sew almost all the way to the V, but stop a few cm away (step 13 in Emma's tutorial).
Cut into the seam allowance at the V (step 14).
Continue with step 15-17 for a really nice finish of the V-neckline. I'm not describing this here, but refer to the pattern's included tutorial. The only difference with this pattern hack is that you've got two V's to do this on.

A few words about the hem
As an ambassador for Janome sewing machines, I had recently received the CoverPro3000 coverstitch and I was really eager to sew the hems with it.

There was no need to change a bunch of settings. I did increase the differential feed a little bit since the manual recommended that for knit fabrics.
Love the result!

This cover stitch machine has a bunch of features and many different stitches you can make. I sewed a 6 mm wide cover stitch using only the left needle and the right needle.

My final thoughts
The neckline does get pretty big with a deep V-neck in the front and in the back - it's almost like the dress wants to slide off the shoulders. It doesn't though :) Maybe because I stabilized the shoulders and neckline - as Emma's sewing instructions show. So I really recommend you to stabilize too.
One option could be to add a string in the back if you want to. You could then attach the two pieces of string, one on each side of the neckline, and then tie them. Something like this:

As I've already mentioned, I love the dramatic effect with the very tense, and quite wide elastic. But it was also cute when it was a little bit more loose at first. At that point I took a strip of fabric and tied around my waist - just to see how it would look with elastic AND a waistband, and I loved that too. I think especially the type of waistband that the Hanna pattern has would look great over the elastic.