

At some point during my Christmas vacation I started thinking about sewing for Valentine's. So I emailed my favourite fabric shop, Tygdrömmar, and asked if they were planning to release new fabrics with hearts or such. Of course they were :) A few weeks later I received these beautiful fabrics and immediately started sewing for my two daughters, 6 and 8 years old.

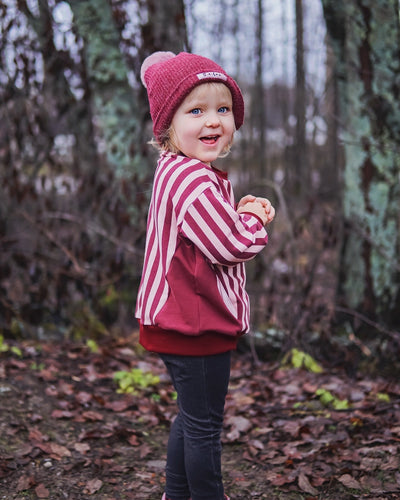
I wanted to make them something with my Kids' Emma pattern. I showed the pattern's design options for my daughters and my youngest chose a short dress with short sleeves, and my oldest chose a blouse with long sleeves.
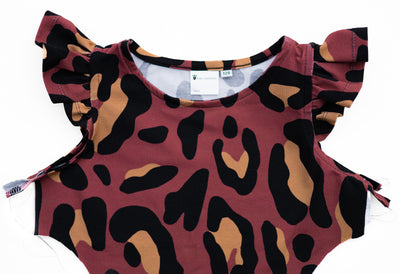
The fabrics that I primarily recommend for Kids' Emma are flowy fabrics with drape. This ribbed jersey fabric doesn't really have much drape but since I know this type of jersey fabric is very popular I wanted to make it anyway and show you the result :) The result would be similar with a cotton jersey (cotton/lycra).
As you may know, these days I include a projector file in my PDF patterns (here's a list of all patterns that include a projector file).
The projector file is optimized to be used with a projector and is very different from the other pattern formats.
Features of my projector files:
- Thicker lines, also solid (no dashes or dots).
- All colors are intense and on the darker side.
- Layered (meaning each size is in a separate layer that you can show/hide).
- Bigger fonts.
- Pattern pieces already mirrored so no "cut on the fold", (where possible).
- All pattern pieces oriented the same way.
- A generous buffer zone in all directions allowing you to position the pattern piece centrally on your cutting surface.
- Calibration grids, imperial and metric, in separate layers.
- Black or white backgrounds, with black or white text, in separate layers.
Here's my setup when I use my projector (which is fixed to the roof and pointing down to my cutting table).

The projected surface is not very big in my case as you can see. If I was cutting a larger pattern piece I would move my cutting table (it has wheels), then place a cutting mat on the floor and cut there. I would then need to calibrate it again (making sure scale is correct and adjust sharpness so I don't do this unless I have to).
I like to have my sewing instructions close by, and of course, a cup of coffee :)

Above I'm projecting the Kids' Emma pattern with the projector file. The projector files have layers - like all A4/letter format do as well. This means I can choose which sizes I want to project.
Here I've chosen sizes 110, 116 and 122 - that's because my daughter is quite slim so I'm blending between these sizes to get perfect fit for her. I'm also showing the text layer and the 5 cm calibration layer - that's the grid you can see. Before I start cutting I use a long ruler or tape measure to make sure this grid is exactly 5 x 5 cm. But once I've made sure the scale is correct I can hide the grid layer if think it's in the way.

These are my settings in Adobe Reader (above). I go to Layers (see red circle), then uncheck all layers I want to hide. In the bottom, at the black field, you can see my pattern is zoomed out at 43,6% - that's the setting that I needed in order to get correct scale.
Here's another picture with these layers shown.

When I've hidden the grid layer, my projected pattern looks like this: (In this picture I'm only projecting size 134 and the text layer, using the Swedish version of the pattern).

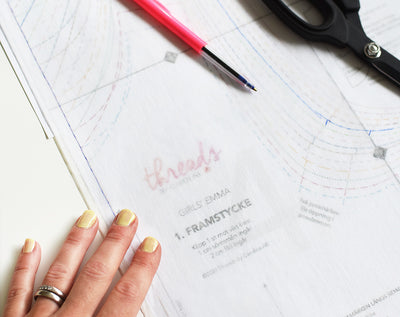
Apart from the sewing instructions, scissors and pattern weights, I've always got a fabric marker close by so I can mark notches.
Here's the final result of my daughters' Valentine's Day outfits! A short dress with short sleeves in size 110/122 and a blouse with long sleeves, and elastic casing, in 134.

Projector sewing is really fun and I can really recommend it! If you normally use PDF patterns with the A4/letter format, this way you eliminate the need for printing the pattern, trimming pages and taping it together.
Be prepared to spend some time calibrating your projector when you first set it up though. It's of course super important that your projector is showing the pattern in the correct scale. You will need to set it up so that it's as sharp as possible and square up the image so that the corners of the image and projected rectangles is 90 degrees.

And how do I feel about sewing Kids' Emma in a fabric without much drape? I still love it :) I think it works just as well with the blouse variant. My personal preference is still to sew the dress in a drapey fabric but this looked really cute too.