

How about this fun pattern hack combining my two patterns Frankie and Vera! I was so excited when Ida Rosberg (@iddypop on Instagram) pitched this idea and I'm so glad she wanted to make a tutorial for this. Thanks Ida!
You can find the Frankie pattern here, and the Vera pattern is free for newsletter subscribers - sign up here.
***
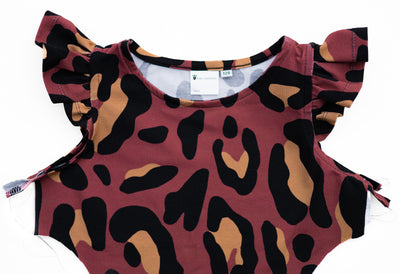
When Caroline released the Frankie sweatshirt I knew immediately it would be my oldest daughter's favourite pattern. After sewing 3 different Frankies I thought she could use some variation. But what do you make for a daughter who only wants to wear Frankie and who thinks she can't wear dresses with wide skirts underneath outdoor trousers?
Well, you take out your skirt pattern Vera, which is not very wide, and is in the same style as Frankie! I think Frankie and Vera go excellent together. The lower edge of Frankie is just as wide as the upper edge of Vera (at least it was in size 128 which I made), but you might need to make some small adjustments.
I used the most simple variant of Frankie with the cropped length (you can make any variant of Frankie, just make sure to choose the cropped length), together with the easy variant of Vera (but you could choose the variant with side panels too).
However, Vera's waistband does not have the same width as Frankie's waistband. I like that Frankie's waistband is wider so I chose that one: the elasticated waistband (pattern piece 9). You need to make this change to the waistband:
Fold the pattern piece lengthwise so the height is reduced by half. Now cut two pieces on the fold and add 1 cm seam allowance along 1 long edge on both pieces.

First, sew a Frankie sweatshirt (without finishing the bottom edge) and a Vera skirt (without finishing the upper edge). Use the Frankie and Vera patterns and their included sewing instructions.
I will now describe how I combined these two patterns with the adjusted elastic casing between them.
1.
Sew together the short edges of each waistband piece, so that you now have two circles. Attach eyelets on one waistband if you want to. Note that you will want to keep the waistband's side seam matched with the dress' side seam.

2.
Pin the waistband pieces on Frankie according to the picture below: one waistband should have its right side towards Frankie's right side. The other waistband's wrong side meets the first waistband's wrong side.
Double check the direction of the fabric in case it's patterned. Pin and make sure all pieces are in the correct direction. If you've attached eyelets on one waistband, make sure that one has been pinned to the front piece.
Sew all three layers all the way around.

3.
Now let's pin the Vera skirt to the waistband pieces, the same way that you did with Frankie. However, this time don't sew all the way around, leave an opening where you can insert the elastic.
The length of the elastic is different in the Vera pattern and Frankie. I chose the length in the Frankie pattern - because I didn't want it to be tight.

4.
Insert elastic into the casing. Make sure the elastic band doesn't get twisted. Overlap and sew together the ends of the elastic and then sew the hole in the waistband.

.
5.
Insert a string through the eyelets. I usually use just a short string through the eyelets, since its mostly there for decorative purposes it doesn't have to go all the way around. A few stitches in the middle of the waistband stops the string from being pulled out.
.

.
Topstitch the waistband at the side seams, straight across the elastic band. This ensures the elastic will stay flat also after wash.
.


.
All done! Frankie + Vera is a relaxed sweatshirt dress with a cool string detail in the waist.
.