

Sewing piping into the seams of your garments is a fun way to add some details. It looks harder and more advanced than it really is. Check out our tutorial and give it a go!
We're using our kids' pants pattern Tyra & Todd. We love how the piping really defines and reinforces the style lines of the pants.

Piping is a type of trim, made from fabric folded over a cord and attached at the edge of fabric, for example in the seams. You can make piping yourself or buy an already made piping.
Looking at this picture below you can see the cord part of the piping to the left, that's the only part of the piping that should be visible after it's sewn into a seam. The piping also has a seam allowance, which we've marked with the black arrows. Note that the piping's seam allowance may not be the same as your pattern's seam allowance!
![]()
We're using an already made piping with stretch, which is important since we're sewing a garment in stretch fabric.
So you will need some piping, a zipper presser foot and aqua glue marker or wonder tape. We're going to add piping along the side seams, at the front pocket, and the back pocket.

Before you start: prewash your piping, because it may shrink! If you've pre-washed your fabric, you should of course prewash your piping as well, unless you're sure that the kind you're using doesn't shrink.
LET'S START SEWING
We're starting with the back pockets of Tyra and Todd and we'll need to do a small pattern hack.
Cut the pattern piece apart 1,5 cm down from the top. Now you have two pieces of the back pocket pattern. Add seam allowance on both of these parts where we split them.

Glue or tape the piping on the right side of the pocket's lower piece. The cord is facing down (see arrow in picture below).
These pants have 1 cm seam allowance and our piping has a seam allowance of 0,5 cm, so we'll need to place the piping 0,5 cm from the edge.

After you've fixed the piping with glue or wonder tape it's time to sew. Use the zipper foot on your sewing machine in order to sew as close to the cord as possible. The dotted line marks the stitching line.
Then place the smaller piece of the pocket on top, right sides together, and sew again, with the zipper foot. The dotted line marks the stitching line, but when you're sewing, flip it over so that you can use the previous seam as a guide so that you come close to the piping cord.

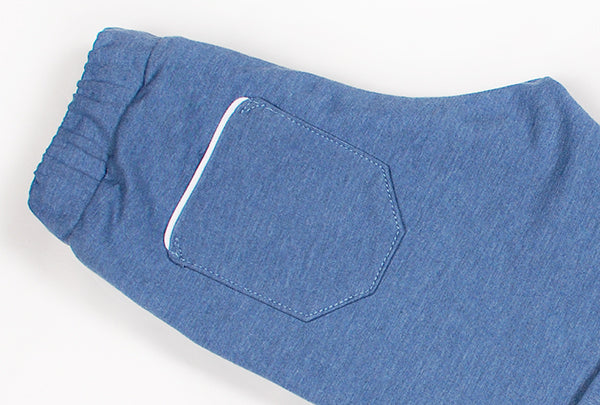
Continue following steps 6-9 in the Tyra and Todd tutorial to finish the back pocket.

PIPING IN THE SIDE SEAMS
Glue or tape the piping on the right side of the fabric, on the front piece. Again, since the pants have 1 cm seam allowance and our piping has a seam allowance of 0,5 cm, we'll need to place the piping 0,5 cm from the edge.
In the picture below, we've already sewn piping into the front pocket seam, and here we're adding it to the side seam. We've glued it to the front piece of the pants.

Sew with a zipper foot, as close to the cord as possible.
Then place the back piece of the pants on top, right sides together and pin, with the piping in between the front and back piece.
Sew again with the zipper foot, using your previous seam as a guide. Afterwards, press the seam allowance towards the back piece.

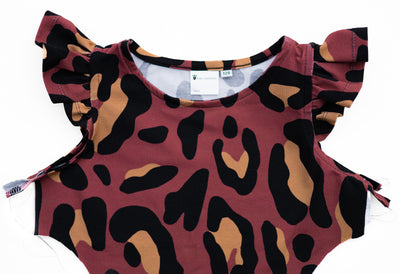
Love the final look!

Don't miss our next blog post (coming soon): how to add a drawstring in the waistband of Tyra & Todd!